A tap water conditioner is usually a water treatment formulation usually mixed with tap water before its use in an aquarium. Fish keepers may purchase one from a local fish shop for water treatment to make tap water safe for fish in their fish tanks.
While this is okay, many hobbyists do not like using chemicals to treat tap water before using it in their aquariums. Here is an informative piece about how to make tap water safe for fish without conditioner.
Can You Fill Your Tank With Tap Water?
Yes, you can fill your aquarium with tap water, but only after ridding it of its chlorine. Tap water is ordinarily not safe for your fish. It contains chlorine which will cause serious health complications for your fish and even lead to their death.

It is imperative to ensure that the tap water is safe for fish before filling your aquarium. But why exactly should you make it safe for fish?
Why Should You Make Tap Water Safe for Fish?
Tap water contains chlorine, and for good reasons. Chlorine is a popular disinfectant used in water treatment, especially public water. Chlorine effectively eliminates viruses and bacteria in public water to reduce water-borne diseases and make the water safe for human use.
So there is a high chance that public water supplies contain chlorine. Here are reasons you should make tap water safe for fish.
Chlorine Harms Your Fish
Another reason dechlorination is essential is that this chemical terminates living cells. Adding fish directly to tap water will lead to their death. Usually, fish placed in chlorinated water will suffer respiratory problems and, in time, die from the suffocation.
Other harms include burning up. Chlorine is so highly toxic that it destroys the sensitive gills of the fish as it burns the region around the fish’s gills. It will also penetrate the bloodstream of your fish and burn every part of the fish skin covering its whole body.
Chlorine Will Stress Your Fish
Even though it is not in excess, leaving your fish in chlorinated water is still not advisable. If the concentration of chlorine in the water is not enough to kill your fish, your fish will suffer stress from the discomfort and will have to endure constant pain in the water. It is not uncommon to see fish in chlorinated water swimming erratically and gasping all over the aquarium.
Chlorinated water is dangerous for your fish regardless of the level of concentration. So it is best to dechlorinate your tap water before putting your fish in it.
While many hobbyists like to remove chlorine with conditioners, others prefer a no-chemical procedure to dechlorinate tap water. How can you make your tap water safe for your fish without conditioners?
Can You Make Tap Water Safe For Fish Without Tap Water Conditioner?
Dechlorinators are also known as water conditioners and can be used to make the water safe for fish. However, many hobbyists loathe using chemicals to get rid of other chemicals. They prefer a natural way.
Another reason is the cost of these conditioners. Many of these aquarium products are just too expensive.
Here are some no-conditioner alternatives to dechlorinating your tap water before using it in your fish tank.
Leave Tap Water Exposed To Open Air
Leaving the tap water to sit exposed to the air for at least 48 hours is one of the straightforward ways to remove the chlorine in your tap water. To do this, you have to leave the water in an open container and leave it in the open for about 24 to 48 hours.
Another way is to simply fill your tank with tap water and leave your aquarium filter and air pump running for at least 24-48 hours while it is exposed. The aeration of the water will speed up the evaporation of the chlorine and ultimately lead to dechlorinated water.
After 48 hours, the chlorine in the water will naturally evaporate from the tap water, and you can then use a submersible pump to transfer the water from the bucket to your fish tank.
But while this method is simple, it is not so quick.
Boil the Tap Water
Ordinarily, the chlorine will evaporate from the tap water if left in the open for about 24-48 hours. But you can dechlorinate your tapwater by speeding up the evaporation process. You can do that by boiling the tap water.
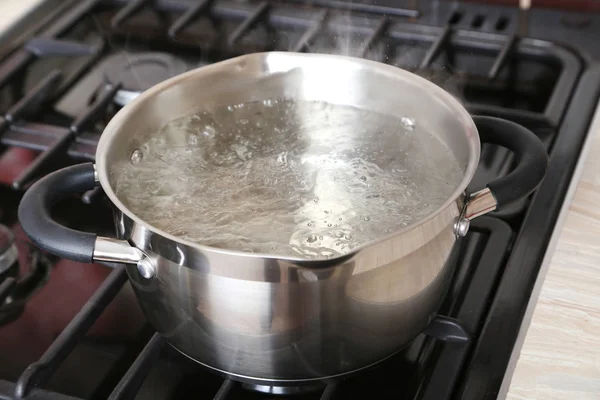
All you have to do is get tap water in a clean pan. You can boil the water with an electric heater or an electric kettle. You can also boil the water with your gas or heat stove. Bring the water (preferably about 10 gallons) to a boil for about 10 minutes. If you are boiling more than 10 gallons, you can leave the water to boil for about 15-20 minutes.
After boiling, ensure to let the water cool before introducing it to your fish tank.
Use Ultra Violet Lights
Ultraviolet lighting is a great no-chemical option to dechlorinate your tap water. Ultraviolet lights dechlorinate tap water by direct action, also known as photolysis. If you opt for this choice, you’ll require an ultraviolet lamp or a lighting system that produces at least 254 nm wavelength with no less than a 600ml density.
This type of ultraviolet light can and will effectively dechlorinate the tap water and even kill off other microorganisms in the tap water.
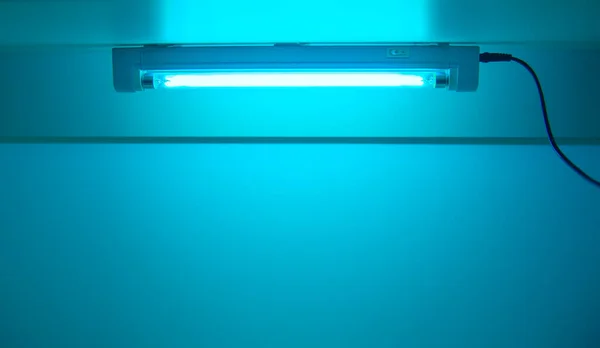
Ultraviolet light encourages chemical reactions started by the assimilation of energy in the form of light to disassociate free chlorine but does it between the wavelength of 180 and 400 nm. So you must get an ultraviolet lighting system that emits no less than 254 nm for best results.
Prepare a place outside for the dechlorination. Place your tank full of water under the UV sterilizer. Station your UV sterilizer light over the bucket of water and leave it on for at least 24 hours. Leave the filter working in the tank while the dechlorination process continues.
Ensure that the UV light penetrates the aquarium and leave it there with the filter running for at least 24 hours. This will not only leave you with dechlorinated water but with microorganism-free aquarium water for your fish to enjoy.
This option is more effective when the light penetrates the water for a long time. It would be best to use UV lighting equipment you can station on the water for a long time. Using a tube UV system may not be as effective as a stationary light that stays right on top of it as the water must flow through it.
Related:
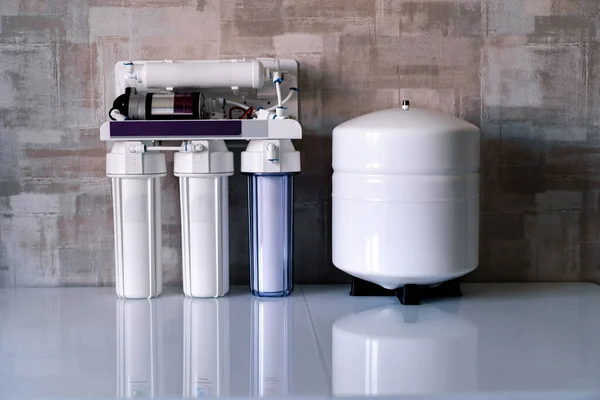
Install a Reverse Osmosis System for Your Fish Tank
A reverse osmosis system removes chlorine and other contaminants and sediments from the tap water, making the water safe for your fish. You’d have to purchase a Reverse Osmosis unit if you do not have one already. After that, proceed to install it with the detailed steps below.
When you get your reverse osmosis unit, you will find little blue clips on the end of the unit. You want to remove the blue clips and push your nail on the pressure fitting of the unit to remove the hose. It should slide out naturally since it is a pressure fitting.
After that, you open up the membrane housing and slide in the membrane while ensuring that the black rubber seal comes on the outside. Slide it into the membrane housing and seal it up as tight as possible. Make sure that the cover is facing the same direction as when you took it off in the beginning.
At this stage, you have to slide the hose you remove from the cover of the membrane housing back in and pull it gently to make sure that it is secure. When you pull it, it should not come out. From here, you slide those blue clips you removed in the beginning back on.
Now you have to fix the water movement. The red hose in the unit is the intake point where the public water supply must go in.
Then you want to arrange the chambers for proper filtration. Unscrew the first and second chambers nearest the red intake hose. Slide in your carbon filter and put it together. Repeat the same process for your second chamber. Be careful not to let the washers in the carbon filter fall out.
Connect your intake pipe to a water source in your house. You can use a garden hose adaptor or a better connector to get water through the red inlet hose. Ensure that the red intake hose is connected to a cold water source so that you do not damage your RO unit.
Direct the blue hose to a storage tank or any available water collector, as this would be the safe dechlorinated water to use in your aquarium.
Direct the black waste line down a drain as this is the line for the brine solution. You do not want this in or anywhere near your aquarium.
Now, slowly turn on the water supply and allow the RO unit to run for 60-90 minutes. Note that the water discharged from the black and blue lines are not suitable for use. The first few gallons of water typically flush any fine and preservation oil from the membrane’s surface.
While your unit is running, it would be best to check for leaks from anywhere in the unit to ensure its proper working condition. After confirming no defects and discarding the first few gallons from both outlet hoses, connect the blue hose to a collection tank or your aquarium to get your dechlorinated tap water.
While all these methods work just fine, the reverse osmosis system is the best. This is because chloramine is now used in public water treatments. While other no-conditioner treatments remove the chlorine alone, the reverse osmosis system is equipped with many pre-filter chambers to remove the chloramine and reduce the ammonia concentration.
Using Carbon Filters
Carbon filters are another great option to eliminate chlorine present in your tap water. You can purchase a simple design carbon filter that can be fixed under your kitchen sink or to an outlet pipe.
Check your product carefully to find the water inlet and outlet point. If you choose to fix it under your kitchen sink, drill holes to mount the brackets to hold the carbon filter in place. You want to fix it on the cold water side of the faucet.
Disconnect the cold water supply pipe, and connect the supply line to the inlet point of the carbon filter. Fix the other supply hose to the outlet point of the filter cartridge and connect the other end to the line supplying the faucet. From here on, you can access dechlorinated water for your aquarium.
Another way is to purchase the simple models to attach to your kitchen tap. They work great, and they are visible enough for you to know when they need a replacement.
Final Thoughts
After removing the chlorine from the tap water with any of the sure options discussed above, you should test the water with appropriate test kits to ensure it is no longer harmful to your aquarium fish. You can also test for other water parameters such as the nitrate level, general hardness, and other concerns depending on the fish species you wish to keep.
Making tap water safe is crucial to preventing a life-threatening environment in fish keeping. It encompasses removing harmful chemicals, heavy metals and cleaning contaminated water to make the aquarium water safe for fish. Choosing one of these great options is the first step to making tap water suitable for fish without chemicals.

At Aquarium Labs, she's dedicated to assisting more people discover pleasure in fishkeeping and teaching them how to develop into expert pet parents.