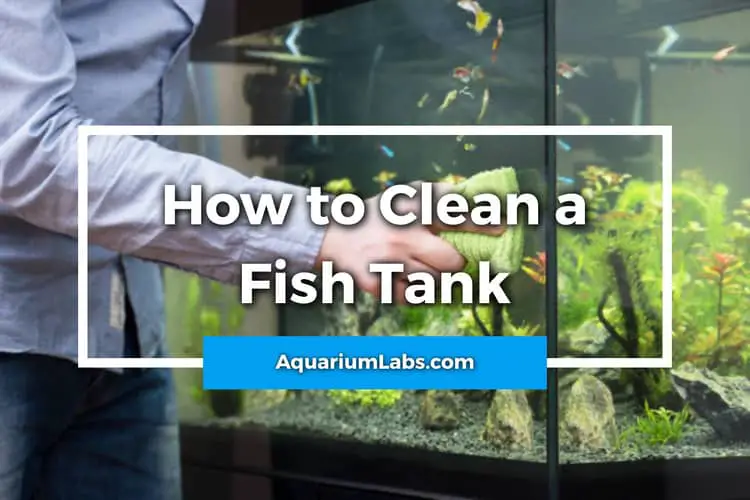
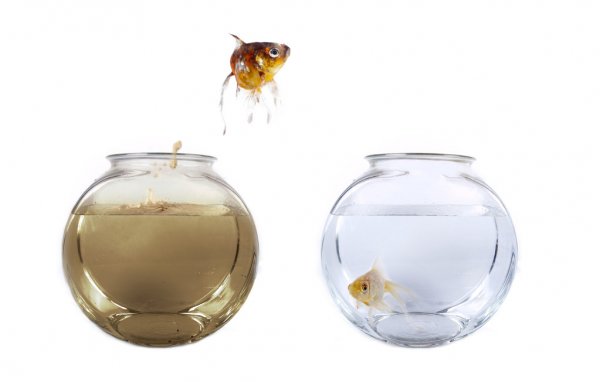
Are you looking at cloudy tank water or slimy decorations? It sounds like it’s time to perform some maintenance so you can enjoy a clean aquarium once more! Poor water quality not only impacts your enjoyment of the tank but how happy and healthy your fish are. Since it only takes a few minutes, let’s talk about how to clean a fish tank the right way!
How Often Should We Clean Fish Tanks?
Routine cleaning should be done biweekly to once a month. This depends mostly on how many fish you have, how large they are, how often you feed, how efficient your filter is, and other parameters.
You also need to clean your tank more often when the water is visibly dirty. Perhaps you have a cichlid that loves to dig or accidentally overfeed. A large tank usually needs fewer water changes, especially if you have fewer fish. But tank clean time will tend to take longer since there’s more water to deal with.
Algae Scraper and Other Tools
Here are a few of the tools required to clean a fish tank!
- Algae Pad
- Fish-safe Glass Cleaner
- Gravel Vacuum
- Plastic bucket
- A Source of Fresh Water
- Water Conditioner
- Filter Media
- Razor Blade
- Soft Cleaning Brush
- Bath Towels (to mop up any mess)
When choosing a bucket to use alongside your water siphon, select one that’s never been used with toxic chemicals like paint. Otherwise, they can leach agents into the replacement water that are harmful to fish. I also like keeping a paper towel or three nearby to mop up drips of water or filter gunk before they can create stains.
Cleaning the Aquarium Glass
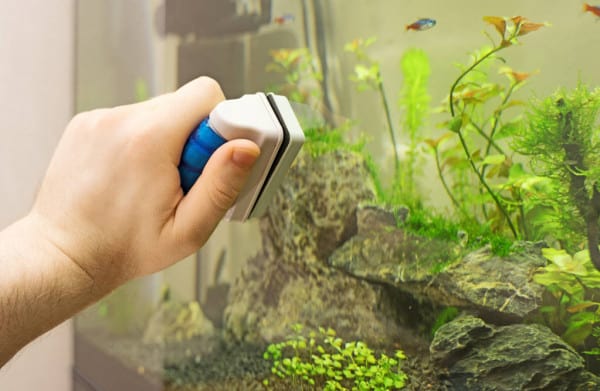
The first step towards a sparkling fish tank is to clean both the inside and outside the glass. The glass panels of your tank will pick up water spots, fingerprints, and other smudges that make viewing difficult. But whatever you do, don’t use a cleaner like Windex! Stick to cleaning vinegar or a non-toxic glass cleaner.
You will also need to clean the interior of algae films and the mineral crust that will form a stubborn residue along the waterline due to evaporation. In a marine tank, this crust is mostly salt, which scrapes and washes away easily. But in a freshwater tank, it will be limescale, which is more resistant. A razor blade can be used to remove light limescale deposits!
When using algae scrapers and other abrasives, make sure that they are rated for the type of aquarium you have. Acrylic and other plastic panels can be permanently scratched by scrapers meant for glass. You’ll have to use gently scrape using a plastic blade or pad to remove algae.
Performing a Partial Water Change
Before removing dirty water and cleaning your fish tank, you’ll need to power off all of the technology running into your aquarium. This includes your aquarium heater, filter, powerhead, protein skimmer (saltwater only), and other devices. Heaters can crack or shatter if left on long enough to dry and then suddenly splashed by water. You can leave your aquarium lights on unless you have uncovered incandescent or fluorescent bulbs, which can shatter if splashed.
You’ll next use your gravel vacuum to simultaneously remove 20-50% of the tank’s dirty water and debris that’s collected at the bottom. Gravel vacuums are usually either gravity powered or run using water pressure.
Gravity vacuums are cheap and easy to use but require you to haul buckets from your tank to a disposal place like the kitchen sink. And you’ll then have to do the same in reverse to fill it. However, water pressure aquarium vacuums can be hooked up to any faucet and used to both clean a fish tank and then fill it back up with no buckets required!
Filter Maintenance
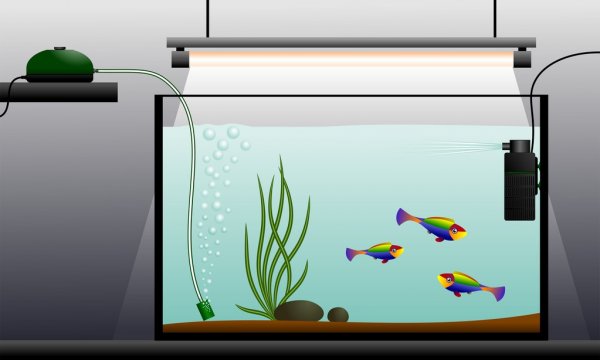
Filter maintenance is essential, but it often gets forgotten by aquarists who are in a hurry. A good filter is key to a clean fish tank. Your filtration system uses specialized media to screen out fish waste, chemically bind dissolved organic matter, and provides a home for your ammonia-eating beneficial bacteria. Without a filter, you would need to keep fewer fish in your tank.
Exactly how to clean your filter depends on the kind you have, be it a sponge filter, hang on the back power filter, or a canister filter. Fortunately, there are steps they all have in common. First, we need to disconnect our filter from its power source. This is especially important for filters with pumps. Filter pumps should not be allowed to run without tank water because they rely on it to cool them. A filter pump can overheat and break or even catch fire if ignored for too long.
Changing Your Filter Media
Next, you’ll need to clean and replace any media that’s expired. Your filter media is just as important as your beneficial bacteria. Ammonia absorbers and other ion exchange resins have a limited capacity to capture dissolved chemicals and need to be primed in a salt solution before being reusable.
Activated carbon will need changing biweekly as well as fresh carbon. Make sure that you rinse your new carbon to remove the fine dust and grit that tends to build up in storage. If added to your tank, it can get lodged in fish gills, causing severe irritation.
Filter cotton floss acts as a mechanical screen for large particles and will eventually grow weak and fall apart over time. Fresh filter floss either comes with replacement cartridges or needs to be folded into a filtration chamber. This way, your aquarium water will be polished through the actions of mechanical, biological, and chemical filtration all at once!
Treating Your Tap Water
While you probably have all the drinking water you need from a handy faucet; this water needs a little treatment before adding it to your tank.
The first thing you should do is try to get your tap water as close to the same temperature as your main tank as possible. Fish can be shocked by sudden drops in temperature. While a change of 2-5 degrees won’t be harmful, instant drops of 10 degrees or more can be fatal. I always use a thermometer in the bucket I use to add new aquarium water, so I know that the water temperature is just right.
But warm water is only part of the process. You also need to treat it to remove the chlorine and chloramine that water treatment facilities add to tap water.
A tap water conditioner works great for this. These chemicals are meant to kill any bacteria missed by treatment but are toxic to all aquatic life, including fish and beneficial bacteria. If you’re interested on making tap water safe without conditioner, check out this guide.
Fortunately, creating dechlorinated water is very easy to do. Simply add the requisite number of drops or milliliters of solution to the bucket. Then swirl it about for a few seconds. Chlorine and chloramine are instantly neutralized, making your water fish-ready!
If you know for a fact that your local treatment facility uses only chlorine, you can let the water sit for 24 hours. While you’ll need to warm it back up, the chlorine will outgas over time. Chloramine is formulated to stay in solution, though, so you have to treat chloramine-saturated tap water before adding it to your fish tank.
Filling Your Aquarium
When filling your aquarium, we don’t want to simply dump clean water into the tank. This will stir up the substrate and bring particles of waste you missed up into the water column. The force can also dash fish against rocks and other hard surfaces, uproot live plants, and mess up your aquarium gravel. You want to pour water into the tank gently. For small fish, floating a Tupperware container at the surface and pouring onto it will diffuse the force of the water enough.
When using a water pressure-powered siphon hose, you’ll need to get the water temperature right quickly and add a de-chlorinator directly to the tank. Fortunately, water conditioners act instantly to neutralize chlorine and chloramine.
Artificial Plants and Other Decorations
You likely won’t have to clean your aquarium decorations each time, but it’s a good idea to perform a spring cleaning every so often. Algae and bacterial slime can build upon not only the glass but on rocks, plants, driftwood, any other exposed surface in the tank. You’ll need to gently scrub them to clean algae and other biofilms from them.
If you have live plants, a pair of aquascaping shears should be used to cut back overgrown stem plants and dead leaves. Never use paper scissors; they are too dull and will crush the stems, making it harder for the plant to regenerate.
Treating Artificial Plants with Bleach
Silk artificial plants tend to be harder to clean than plastic ones because they have a fine fabric mesh for things to grow into. If you’re finding stains to be too stubborn to be scrubbed away, then you should try soaking them overnight in a 1:5 solution of bleach, followed by a double rinse in water that’s then heavily treated with de-chlorinator to remove any chemical residue before adding them to your fish tank. You can also use a 1:5 solution of white vinegar, which will kill algae and only needs a long soak in freshwater to be returned to your tank.
Conclusion
Cleaning an aquarium sometimes feels like a hassle. But once you fall into a rhythm and learn how to do it the same way each time, it often takes less than an hour for smaller tanks! So why wait? There’s nothing like a regular clean water change to keep your fish happy!
Related Frequently Asked Questions:

At Aquarium Labs, she's dedicated to assisting more people discover pleasure in fishkeeping and teaching them how to develop into expert pet parents.