Introduction
So, you’ve decided to set up a saltwater aquarium, but you’re not sure where to start. This can be a difficult process, especially for newcomers who’ve never set up a tank or worked with saltwater before.
Whether you’re new to saltwater or you’re used to housing fish in freshwater aquariums, this guide should cover everything you want to know to get started with your own domestic saltwater aquarium.
Below you’ll find we’ve covered the following:
- How to plan your aquarium size and location
- Equipment you’ll need and how to set it up
- How to mix saltwater and test it
- Some of the best saltwater fish for beginners
- How to maintain your aquarium
Of course, we have other pearls of conventional wisdom spread throughout, too. You’ll also notice that, where possible, we have referenced away to supporting material. These are to support any claims that we make or link away to more in-depth pieces of information on any one section.
While this guide covers everything, we’ve strengthened it by adding references that go into more detail on some of the topics we cover.
Now that we know what to expect, let’s get into our guide to setting up your very own saltwater aquarium.
Planning

Even some of the smallest aquariums are still quite big when measured against most other installations or pieces of furniture in your house. That’s why it’s paramount that you plan out your saltwater aquarium before you even think about making a possibly incorrect and unnecessary purchase.
There are two main considerations when planning your aquarium. They feed into each other, too, so if you have an answer to one then you should be able to determine the other. They are tank size and tank location.
Tank Size – Bigger is Always Better
As you can read in the subheading, it’s often the case that bigger is better when it comes to aquariums. What does this mean?
Well, it doesn’t mean that you should bulldoze walls out of your home to make room for the biggest saltwater aquarium you can afford.
Instead, it means that there’s no reason not to get the biggest aquarium within your financial and spatial needs.
Without making any substantial change to your home, identify a location. We have more on how to do that below. Once that’s done, you’ll need to figure out how many fish you want and how big those fish species are.
As we said above, we have a list of beginner saltwater species below, so check them out if you’re stuck for ideas.
The tank size you choose will depend on the location and the quantity and number of fish you want to house. If you’re just starting slow but you expect to get more, there’s nothing wrong with future-proofing by getting a larger tank than you currently need.
Just make sure that the fish you choose will be comfortable in the larger environment.
Paradoxically, many beginners opt for tiny aquariums that can actually be more complicated to run when maintaining a specific environment, like tropical and, you guessed it, saltwater.
Also, they find out they really like fish and end up getting more, maxing out the spatial capacity of their tank. Remember that more active fish species will require a higher minimum gallon count to freely move around in.
If you do know what you want and exactly how you want it, you can get starter kits that include all the equipment you need for a humble aquarium setup. These limit your choice of components, something we’ll get into later, but their convenience can make the whole process much less stressful.
We’d say to just get the largest tank that your budget can afford, that can also comfortably fit into your home. Speaking of which…
Where to Keep the Aquarium
Of course, the location of your aquarium is going to inform its size.
Sometimes you can eyeball it or be confident that the tank you have in mind will fit in its planned space, but as a point of principle, you should always get measurements before committing to any grand aquarium project.
Don’t just peer over the tip of your thumb and call it a day.
There are other considerations here too, like the sun. Keep the tank out of direct sunlight to avoid the growth of harmful algae and the warming of the water.
Similarly, keep it out of the way of any draft points in your home as this can cool the water, sabotaging temperature regulation. You’ll want a place with a stable temperature profile, meaning keep it away from cooling influences like windows and air conditioners and heating influences like heaters and radiators.
Remember you’ll have to clean and maintain the aquarium too, so avoid putting it in a cramped space where you can’t properly access vital mechanisms or comfortable clean the interior of the tank.
You also want it to be suitably visible to yourself and guests, of course. Why spend money on the tank and the fish to go in it if you’re going to tuck them away into a dark corner?
Another thing to keep in mind, once it’s set up, you really don’t want to have to move it. That’s a lot of work and will involve disturbing your fish by draining the water, stressing them out. In order to avoid that stress, for both yourself and the fish, you should put it somewhere that isn’t needed for the far foreseeable future.
Equipment and Set-Up
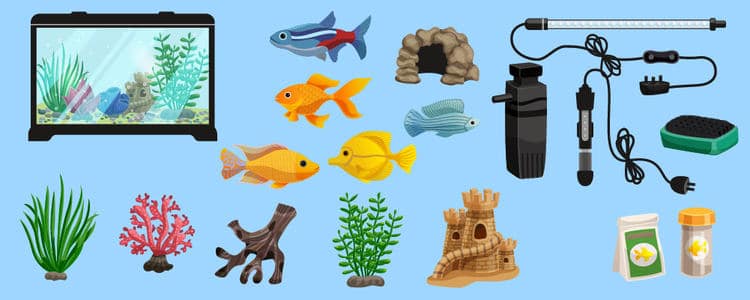
So, you’ve got a dream aquarium in mind and the perfect place to put it. The question now is, how do you set it up and what do you need? Let’s talk about prefabricated aquarium kits and building your own tank, and which one may be more suited to you.
We’ve also got a quickfire guide on what you should do for the tank, stand, pumps, filtration, light, and heater of your aquarium setup.
All in One or Build Your Own?
This is a question that’ll come up early in the process of setting up your own aquarium.
Just a cursory look online shows so many options for aquariums and, to make it all the more convenient for first-timers, many of them are pre-fabricated.
By pre-fabricated, these are all-in-one tanks that come with stands, pumps, and all the work you should want to get a functional aquarium off the ground.
That doesn’t mean you won’t have to make accompanying purchases, of course, but most of the work is already done.
So, what are the benefits of this?
- It’s more convenient
- Easy to understand and acquire individual parts as part of a package
- Can be less expensive than acquiring individual parts yourself, depending on the setup.
The main downside is that you don’t get as much control over the setup that you would with a piecemeal system. That said, we’d very much recommend looking at your all-in-one options. If the options available to you are suitable in both size and price, there’s nothing wrong with getting one.
If you’re in need of other opinions, there are many trusted voices online who have taken a look at and compared aquarium types.
Equipment Needed
Let’s say that you do want to build your aquarium system piece by piece, either to potentially save some cash or to learn the ins and outs of a fish tank. In that case, you’re going to need a few things:
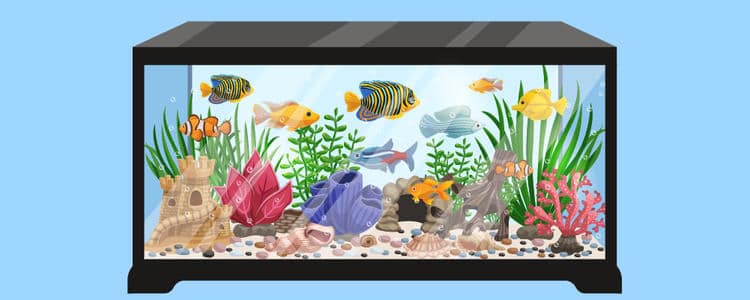
Tank
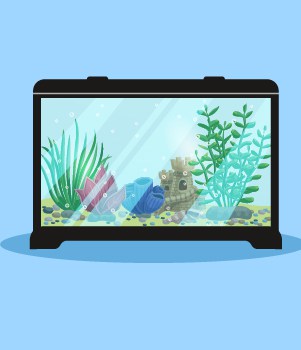
Yes, we’re starting with the obvious. For your fish tank, you’ll want a fish tank. We’ve already covered the size and space considerations you need to keep in mind above, so let’s go into more detail about what you should have in your tank.
For one, you want a tank that can house the pump and filtration systems that the tank runs off of, which is why so many larger tanks function as storage to keep all those mechanisms close to the aquarium itself.
It’ll also need access to plug sockets and other electrical power supplies.
You also need to decide on a material for the tank. Fortunately, you only have to choose between glass and acrylic. Glass is recommended as they’re more cost-effective and scratch-resistant, and it’ll stay clear for a long time to come.
They are heavier though, and it is glass, so it’s brittle and can break from impact. Thick glass doesn’t have that problem, and you should definitely have reliable, thicker glass for your aquarium, but that just adds to the weight.
A rare but possible fault is also that the silicon used to prevent leakage fails. You can avoid this by buying from a reputable brand.
As for acrylic aquariums, they’re easier to mold into different shapes, meaning your aquarium is made from fewer pieces which eliminates the possibility of leakage. They’re lighter too, so easy to haul around when building your aquarium for the first time.
The downside to acrylic is that it can scratch quite easily and so you need to clean and place decorations inside the tank carefully. It’ll also get foggy over time as micro-scratches build up from cleaning. It can also cost more than glass.
Stand

Your aquarium isn’t going on the floor; it’s going to need a fish tank stand. This won’t be any old stand, however, as it’ll need to bear the tremendous weight of your fish tank and all that water, while also having storage space for equipment and the onboard filtration system.
This means that your stand will usually be a solid one, not an open-framed one that can’t store much or even support the aquarium’s weight.
A solid stand can also be used to match the style of both the aquarium and, in doing so, tie the tank to the room better where décor is concerned.
It’s not uncommon to get a tank and aquarium as a combination, so don’t stress too much about choosing a stand if you haven’t got a specific product in mind yet, chances are that you’ll get a tank that automatically comes on-stand.
Pumps
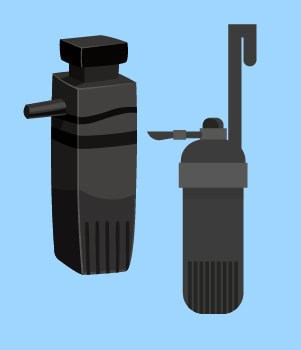
Pumps are how air is transferred throughout your aquarium system. They increase tank circulation by moving air and water around, balancing the levels of carbon dioxide and oxygen within your tank.
They also increase surface area in the tank, allowing for gaseous exchanges that turn that carbon dioxide into oxygen.
You may want a pump in your aquarium because it’ll help your fish to breathe.
More oxygen is good for your fish, so you should definitely budget for a pump if you can.
They’re also great for replicating the natural conditions that come with flowing water and can be made to look good in your tank.
I’m sure we’ve all seen the erupting sea volcano ornaments before, those are often functional air pumps in disguise. If you’re getting semi-aquatic animals, crabs, or frogs being the more popular examples, you’ll want to have as much oxygen as possible, so get a pump.
It’s also relaxing to watch, adding a quiet calmness to the aquarium that’s appealing visually. It’s worth noting that if you have an undergravel or canister filter, more information below, then you probably don’t need a separate air pump.
Filtration
Filtration is a necessary and fundamental component of any successful aquarium. Learning about filtration can be daunting for first-timers, so we’ve got the pointers for you right here.
First, you need to decide whether or not you’re going to have a sump. Those are the containers that you may have seen sitting beside or in the stand of other people’s aquariums and fish tanks.
You can get these with or without filtration built-in but we’d suggest going for the filtration option if available. When used properly, you can use it as a hub to tweak filtration methods.
Some examples are adding a nitrate reactor to the system or a skimmer for protein, but we’re getting ahead of ourselves. Having a sump is great for oxygenating your water too.
You have to plumb it, of course, but that’s easier than you may be thinking with the help of affordable PVC piping and tutorials. What’s more, sumps aren’t mutually exclusive with biological filtration methods. In fact, hobbyists often use both for maximum filtration.
That brings us to the different methods of filtering water. Fish need filtration because they produce ammonia, which the filter turns into nitrite and then nitrate, which is what is then removed via water changes. There are four distinct ways to perpetuate this nitrogen cycle and filter your saltwater aquarium.
1. Undergravel Filters
Once very popular, this method of filtration isn’t as popular now as it once was. Undergravel filters use a plate base that sucks water downwards, through the nitrifying material at the bottom of your tank.
In most cases, this is gravel. From there, the water gets circulated through the tank. They operate through an air pump or an air stone.
They’re best for smaller tanks. We’d say 50 gallons is the cut-off point. These smaller tanks will tend to be fish-only for casual aquariums too, but you need to keep an eye on the gravel and clean it when needed. This method can only filter so much, so it can’t keep a lot of fish happy. They also need to run for a period of time before fish can be safely put inside.
2. Live Rock or Sand
The most popular filtration method for aquariums nowadays is leaving the biological nitrogen cycle to do its thing using a natural landscape.
This means your setup uses sand that contains real bacteria that exists in the ocean (Jaubert method) or live rocks that have been cultured so that bacteria and other microbial sea life can grow on their surfaces (Berlin method). These naturally filter the aquarium into which they’re placed.
For sand, you’ll want about four inches worth of sand depth, while 1.5 pounds of rock are suggested for a Berlin filtration system. You can use both too, and many experts do so because they don’t have a waiting cycle like other filtration options.
3. Canister Filters
Canister filters make use of sumps or other containers that are kept under the aquarium, in the stand. There, they use a pump to pull water down into them, through a filter, and then send it back up for the fish to enjoy.
Though it may look like a mechanical process, there are biological elements to this too. Namely, the use of plastic or ceramic to act as a nitrifying material and promote bacterial growth.
They’re great for larger aquariums but they do need maintenance, which becomes more intimidating when it’s a mechanism that you have to dismantle in order to do that properly. If not properly done, the filter pads get so contaminated that they can add toxins to the water. They also have to go through a cycling period.
5. Wet or Dry Trickle Filters
An alternate option for small aquariums is trickle filters. These are where the water is pumped from the tank, as they would with a canister filter, but they usually use a wheel that gathers nitrifying bacteria. Like the undergravel systems, they work best with fish-only tanks and need frequent maintenance.
It’s a known problem that the wheels get clogged, so that’s something you need to watch. Bacterial loss from a stopped wheel will harm your aquarium’s filtration, causing problems for their interior environment and its population. Like the others, trickle filters require a cycle period before becoming fully operational.
Light
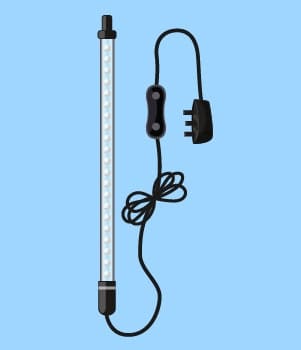
There’s a lot of reasons why you need to have lights in your saltwater aquarium. Firstly, you want to see it since these installations are often considered decorations by homeowners and guests alike.
This is especially the case if your aquarium has been very expensive and time-consuming to set up.
Also, it helps the wellbeing of your fish by having a mockup of the day/night cycle.
Like any other natural creature, fish have a circadian rhythm too, and you’ll want to cater to this by providing approximately eight to ten hours of light every day.
When the lights dim or turn off completely, your fish will know to rest and minimize stress and disease in their little bodies. If you have coral or other sea plant life in your aquarium, you’ll especially want to get a light system set up.
They need light to make sustenance and may even require a specific lighting profile to properly thrive, so do your research on every living being you add to the tank to make sure you can cater to them all with the same compatible lighting scheme.
You can have three light options. See a breakdown of them in the table below:
Pros | Cons | |
Fluorescent Light |
|
|
Metal Halide Light |
|
|
LED Light |
|
|
Heater
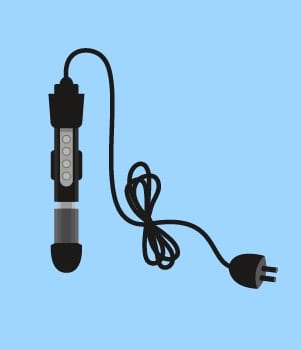
Heaters are important in keeping your fish comfortable, especially if you live in a region in which the fish species aren’t naturally found.
Winters can be treacherous on many fish tanks too, so safeguard your aquarium through the use of a heater.
The best ones can be fully submerged within the water of your tank and need to be large enough to properly heat the water volume thoroughly, though you don’t want it to take up too much space or be unsightly to look at.
It’s a balancing act, but we’d always lean towards getting too big a heater than one that’s too small.
As a handy tip, make sure you place your thermometer on the opposite end of the aquarium to where you place your heater. That way, you can make sure that the temperature is consistent across the tank instead of being localized in one area.
How to Mix Saltwater
So, you should have an idea of what goes into building the physical housing of the aquarium by now. That’s great, but you’re going to need water to put the “aqua” in “aquarium,” and since we’re working with saltwater, the tap isn’t going to do. This will likely mean mixing your very own saltwater to use.
There are two main things to consider when adding water to your tank. First, you need to have a substrate. This is a layer of material that’ll lie at the bottom of your tank, usually gravel or live sand as we discussed above.
As you can imagine, it takes a lot to change this out, so pick the one you’re satisfied with for the foreseeable future.
Assuming you’ve checked for leaks, then you should power down your aquarium system and remove several gallons of water from the tank. If you have a sump, remove some water from that too. Do yourself a favor and get clued up on what to do if a leak does occur.
At that point, it’s time to add sea salts. This is easier with a sump as you add them straight to the sump container and then activate the return pump, circulating the water over the sea salts and dissolving them faster due to the water movement.
Otherwise, turn on your filter and other powerhead devices to cause movements within the water, facilitating the dissolution of the sea salts. Use a salinity tester to make sure that you reach your desired salt level and stop when it has been reached.
If you do have that live sand that we’ve already talked about, the water will get cloudy when you drain some water and disturb the substrate. Don’t worry too much about that, it’ll be cleared up by your filter as soon as things get back to work.
Non-live sand or gravel that’s not supposed to be dirty or kick up clouds of debris should be washed with fresh water before being returned to the tank.
Water Testing
An important part of aquarium maintenance is water testing. We have a dedicated section on maintenance below but, as we’re discussing putting water into your tank right here, it’s relevant to bring this up now.
Think of water testing as troubleshooting for your aquarium system and the water within it.
One of the consistent problems that make water testing a necessity is the gradual accumulation of debris and detritus.
Whether it’s natural or from dead animals within the tank that you didn’t spot straight away, these buildups promote spikes in ammonia, nitrate, and phosphate.
That first one can be downright lethal to your aquarium population while the other two promote algae growth. After a certain point, controlling algae becomes a fool’s errand, so prevention is so much better than cure in this case. This all means you need to water test regularly.
If you have sea life-like corals or invertebrates in the aquarium, you’ll also need to measure the alkalinity level of the water, and how much calcium is present. If the balance of these elements is disturbed, you may lose coral, crabs, and other crustaceans that need specific alkalinity to thrive.
We’d advise you to check all of the following every week:
- Ammonia
- Nitrate
- Phosphate
- pH Levels
- Calcium
Fortunately, you can get test kits that include all if not most of the required tests that you need to reliably measure these metrics.
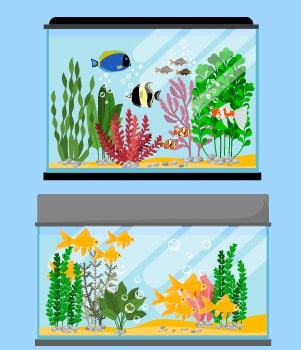
Best Saltwater Fish for Beginners
Now we know all the basics of aquarium construction, operation, and saltwater filling, it’s high time we talk about what you can put into the tank.
The fact you’re working with saltwater will restrict certain species from you, so you should always make sure to check that a species is compatible with the tank that you want to place them in, to avoid unwittingly harming your potential pet.
When buying, it’s always best to see the animal in detail to make sure they’re healthy. This means no unfamiliar markings, no white spots (especially on fins), and that their eyes aren’t fogged or pearled up.
These can all be signs of disease and other problematic conditions in those fish. Make sure you can see them eat too. An animal that refuses to eat may have a problem. Similar rules apply to coral and other plant life. Learn what they look like in their prime, and don’t buy any with dead segments attached to them.
Once you’ve made a purchase, acclimate them with a clean bucket and the water that they came in. Then, slowly add aquarium water to the bucket with the aim of gradually tripling the amount of water in the bucket at first.
This is a process that should not take too long, approximately a quarter to a half hour. Then you can add the fish to the water with a net.
Note that you can’t put invertebrates in the same water that fish are taken home in. It may be treated with copper, in which case it’ll kill crabs and other non-fish sea creatures.
With all that out of the way, here are some of the most popular, easier to care for, and safe saltwater fish.
Clownfish
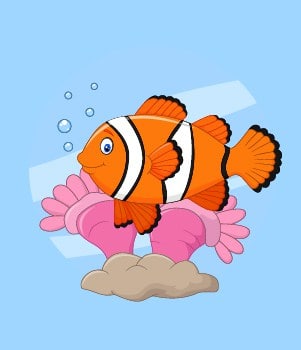
The undisputed king of commercial saltwater pets is the Ocellaris Clownfish, otherwise known as the False Percula Clownfish, or just clownfish if you’re friends with them.
The popularity of clownfish comes from a few places.
First, they’re incredibly easy to take care of.
Saltwater fish tend to have a reputation for over-sensitivity that clownfish don’t follow, so they’re great first pets.
They’re also visually striking and, of course, they were heavily popularized by Finding Nemo.
Clownfish are easy to take care of because they’re hardy and have very specific territorial behaviors, namely that they don’t stray from an area once they’ve taken a liking to it. To avoid some of the troublesome mating rituals that wild clownfish partake in, we’d advise you to make sure to buy tank-raised pets.
Angelfish
Of course, there are many species of angelfish out there, the best species for beginners would be dwarf species like the Coral Beauty Angelfish or the Flame Angelfish.
These are both visually striking with none of the attitudes that usually come with bright colors in the animal kingdom.
Angelfish are great if you want a more substantial saltwater fish to take care of. These large, flat pets tend to fit in very well in aquariums.
Those two species usually play nice though territorial disputes are always a possibility, particularly if a new fish is being added to their environment after an extended period.
Also, the Flame Angelfish has a reputation for biting at coral, so they’d need to be separated or you should ditch the invertebrates if you want one of the orange troublemakers.
For angelfish that won’t cause your corals to die, read this article.
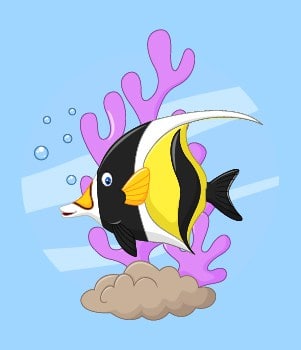
Butterflyfish
Butterflyfish are a lot like angelfish in terms of why they’re perfect for a beginner’s saltwater aquarium.
They’re on the larger side for small saltwater specimens, flatly shaped, and that results in a lot of surface area for them to show off their exotic patterning as they make their way through the environment you have made.
We also have two specific types to recommend this time too, the Auriga Butterflyfish and the Raccoon Butterflyfish.
Despite the name, the Raccoon is just as visually striking as the Auriga species in our opinion.
They’re also very similar in how they keep. They’re both very easy to keep and gel well with other pacifist fish, they only ask that you get a lot of ornaments for them to dart between and hide behind.
They can be picky eaters, so this is certainly a fish you want to see eating prepared saltwater fish food before you buy. If they won’t, you can win them around by letting them witness other fish eat the food, at which point they’re more likely to realize that they can enjoy the food too.
Damselfish

Some damselfish have a reputation for not playing well with others, but that isn’t a concern with the Blue-Green Reef Chromis or the Yellowtail Damselfish.
They buck the trend by playing well with other domesticated fish and invertebrates like coral.
They’ll adapt to tank life seamlessly and, while the neon blue and yellow colors of the Yellowtail make it the easier pick between the two if you’re buying for beauty, the Chromis’ scales have a nice reflective sheen on them too.
Dartfish
The Fire Dartfish, also called the Firefish Goby, is a small and wary fish.
Perhaps too wary, as they’ll hide away from others unless the aquarium is big.
You can have them with a mated pair if you want multiple, but otherwise, they’re best kept by themselves.
Also, cover your tank, as they have a reputation for jumping up and out of the aquarium, which is a bad situation for everybody involved.
Betta Fish

To finish off our recommendations, we have what is perhaps one of the most consistently misunderstood fish species that you can buy on the market.
Perhaps better known as Labyrinth Fish or Siamese Fighting Fish, there’s, unfortunately, a huge market for breeding, raising, and selling these fish in sub-optimal conditions.
That doesn’t mean you can’t give one a happy home in your saltwater aquarium, however.
The diet for the Betta Fish needs to involve insects to make sure they get the required nutrients.
Their flowing dorsal and caudal fins can get nipped by other fish species, so you should be very careful which fish you place this one with and quick to act if abuse does occur. Assuming you’ve got a calm and singular Betta Fish, they can get along with other docile species and even frogs or ghost shrimp.
Aquarium Maintenance
As we near the end of our guide, we’ll wind down with a few more details on aquarium maintenance and what you, as an aquarium owner, will have to do to keep everything running smoothly.
You’ll need to change and replace the water in your aquarium semi-regularly. These are two distinct treatments that are better off explained.
Water replacement is where you need to add water every day due to gravity. You could maybe get away with every other day but adding every day is the surefire way to avoid future problems.
When water evaporates, the vapor doesn’t carry the water’s salt content. This means that when the water gets lower enough through evaporation, the water to salt ratio tips higher in the salt’s favor.
Using some kind of marker to mark the water level, either on the tank or the sump, is a great way of keeping track of the desired water level whenever you want to fill the aquarium up.
Water changes, on the other hand, is where you remove nitrate to begin the nitrogen cycle again anew. This is where you remove some water, we’d say 10% for smaller tanks and 20% for larger ones, once a month.
Then you turn the aquarium off and test the water you’re getting. You can test once a week, or even for two weeks. Make sure you wash the substrate if you need to and clean any mechanisms that the pump and filtration use and wash the surface of the tank if that’s possible.
Replace lights as they age and die out, and always be on the lookout for new and improved parts for your aquarium to improve your setup.
Summary
There you go, we’ve reached the end of our ultimate guide to setting up a saltwater aquarium. It’s quite the process, so don’t feel pressured to get it all done in record time. Instead, start planning out and gathering your equipment over a period of time to minimize stress.
Remember, if you’re doing it right, the living creatures will be among the last things you get for the aquarium.
This guide isn’t going anywhere so, if you get halfway and can’t remember what to do next or want some pointers, you can always come back and refresh yourself with the knowledge we’ve laid out above. Until then, goodbye and good luck with your aquarium setup!

At Aquarium Labs, she's dedicated to assisting more people discover pleasure in fishkeeping and teaching them how to develop into expert pet parents.